|
|
|


| STRENGTH | 10 | INTELLIGENCE | 10 | SPEED | 6 | ENDURANCE | 10 | RANK | 10 | COURAGE | 10 | FIREPOWER | 9 | SKILL | 10 | OVERALL | 75 |
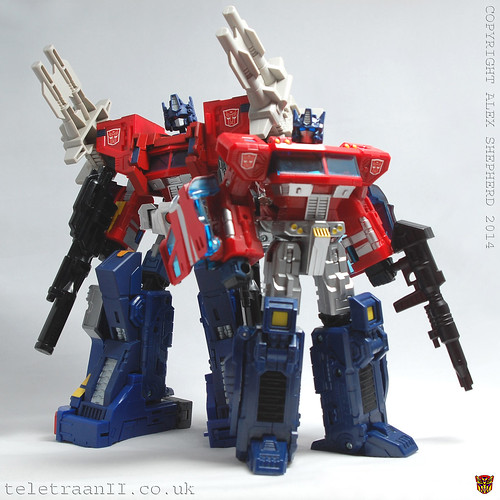
Click the image above to see the alt mode, or view more photos here
First Appearances
First/Last Comic Appearance (US) - Issue 42, July 1988 / Issue 76, March 1991
First/Last Comic Appearance (UK) - Issue 198, December 31st 1988 / Issue 281, August 4th 1990
First/Last Cartoon Appearance -
First Toy Appearance - 1988
Click here to see Figure Details and review
Figure Details
Manufacturer - Custom
Toyline -
Additions/Mods:
- Customised a KO version of FansProject D.I.A. Commander armour
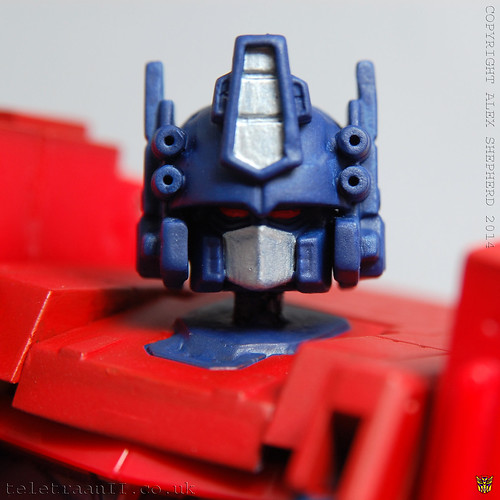
- Added the head from Energon Optimus Prime
- Added G1 Powermaster Optimus Prime weapons
- Added Autobot symbols to the shoulders
- Added large Autobot symbols to the sides of the trailer
- Added an Autobot symbol to the front of the trailer
Review
Back in the G1 days it may have shocked you to know that it was very unusual for any character to be gifted a new form, and the first figures to buck this trend were Goldbug and, of course, Optimus Prime. You could argue that Galvatron and his minions beat them both to the punch, but whether they actually have any association with their original characters has yet to be proven. Certainly Cyclonus and Scourge have no recollection of what they previously were, and Although Galvatron may have some inkling, the brutal and at times suicidal lunatic has little to do with the brash, calculating yet ultimately cowardly Megatron. Not so with Optimus Prime, who had absolute knowledge about his previous body. Of course, the more cynical amongst you might think that this reincarnation was done purely to sell more toys, and you'd be bang on with this assertion. However, it was an update definitely needed as the 1984 figure was positively dwarfed by Ultra Magnus and Galvatron. Unfortunately Powermaster Optimus Prime was to follow the same direction as the city commander by being a brick. You could move his arms up and down and split his legs, but that was it. Even his wee Powermaster buddy, Hi-Q, had more poseability. Despite these shortcomings the character had a fairly long run in the comics, surviving the Epics 'Timewars' and 'The Matrix Quest' before blowing up Unicron in a spectular swansong for the character. I wanted to represent this particular flavour of Optimus in my collection, however the only choice was the Xovergen homage, which made the figure Masterpiece scale. I wanted something that could pose with my Ultra Magnus and Galvatron, so ultimately I made my own, having got bored of waiting.
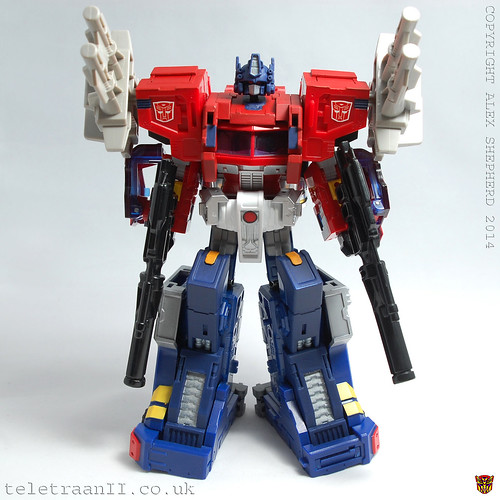
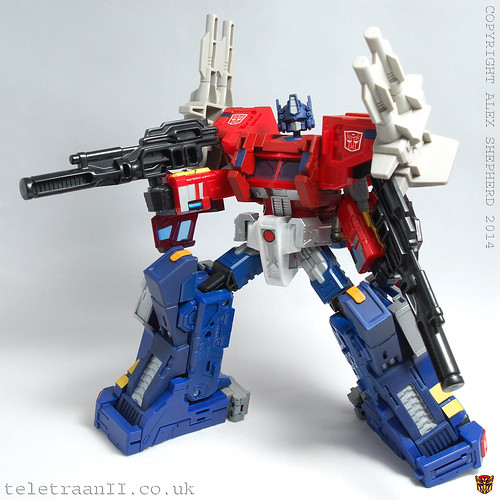
Appearance (Robot Mode) 8/10
The base figure is the Classics voyager Optimus Prime mould, which I happen to think is very decent. You can read me waxing lyrical about it in my Prime review. The armour element of this figure gives Powermaster Prime some much-needed height and bulk, as well as his classic appearance from the comics. I had to cut down the shoulders as they were too 'Ultra Magnus' and also I omitted to not use the massive forearms. The biggest change was to the torso armour - I cut the original head and neck away, and also made the chest panel removable. I had to use bits of plasticard to fill in all the hollow areas which were normally covered by the armour. When it came to the headsculpt there was only one that I could consider - the Energon Optimus Prime figure, if only because it had the signature cylinders either side of the faceplate. It's not ideal but will do until something better comes along. Painting this figure was a challenge. I added the guns from the G1 figure because I couldn't find modern alternatives and thought 'why not'.
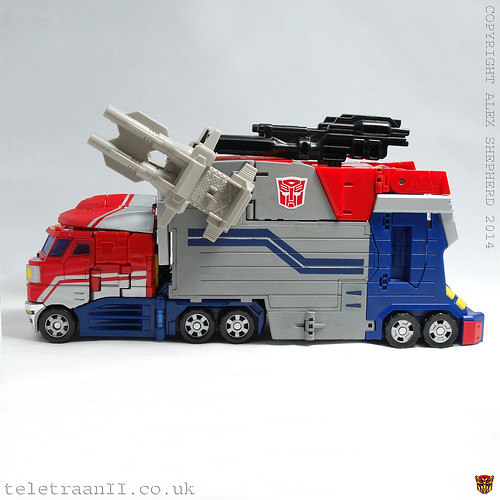
Appearance (Alternate Mode) 9/10
The base figure truck is one of my favourites, and the trailer really makes it. I prefer the Henkei mould colour scheme, but this classics version does a good job of differentiating the two, and is still pretty neat in its own right.
The trailer itself is pretty cool and I had to modify the paintwork extensively, changing the predominantly blue trailer to grey. I mounted the twin guns on the same holes that the missiles typically sit. Then I drilled holes to connect the two black guns to the roof, in a similar configuration to the G1 trailer. I think it homages the original trailer quite well - obviously it is a lot shorter than the original. There is no articulation between the trailer and the truck because they sit flush together, FansProject cleverly utilising a strange tab on the base figure to great effect. This also helps to obscure the void at the front of the trailer which would otherwise be in full view. The rear profile of the trailer has been altered because I cut the shoulders down.
Transformation 8/10
The base figure is one of my favourite figures to transform of all time, it is so damn intuitive and satisfying. The lower part of the cabin sides are folded back, then the legs fold out, and the cabin sides split to reveal arms underneath, which are then cleverly folded into position. Then the top part of the cab swivels like a Rubiks cube to reveal the fake grille which becomes the robot 'abs'. Finally the head is revealed by removing the wind vane and puttng it into position. The wind vane and the smoke stacks both transform into guns, which is impressive but I don't use them.
The trailer splits up into multiple parts which are then transformed into various configurations. The rear wheel section splits in 2 to become the basis of the legs (once you have removed the 'codpiece' first). The remainder of the lower part is set aside as I have glued it together. The shoulder pieces and torso armour are made from the upper part of the trailer, which is lifted out of position and separated. The 'codpiece' and torso armour (minus the breasplate which I remove) attach easily enough - in preparation the base figure must have the head transformed as per vehicle mode. The legs can be challenging to attach and remove. You have to apply a lot of force and the lower legs must engage with the armour just so. The tab which is used so cleverly by FansProject as a trailer hitch really gets in the way here and I advise extreme caution when faced with this tricky obstacle.
Poseability 7/10
For Hasbro's part, poseability is decent without being particularly impressive. The head is on a swivel rather than a balljoint (although you can pitch it slightly up and down thanks to the transformation joint) In fact, there are no balljoints on the entire figure. The waist swivels. The shoulders have a swivel and lateral movement as well, and the biceps also have swivel. The elbows are curiously ratchet jointed while the shoulders are not. The fists cannot rotate and have no articulation save for a useless transformation joint. The hips have swivel both verticaly and horizontally. There is thigh swivel just above the knee, and then standard jointed knees. The feet can be moved back because of their transformation joint. So while all the essentials are in place, it's kind of a mixed bag.
Even with the armour in place, the figure remains surprisingly poseable. The legs gain some articulation because the armour has 'feet' which can tilt to keep the leg on solid footing. The shoulders are cleverly designed to allow as much movement as possible. The head is now also on a Balljoint which I had to build up myself. The reason that I do not pose this guy with the stupid big gun for long periods is because it looks dreadful, and also it will wear out poor Prime's shoulder joint.
Quality 7/10
To be fair to Hasbro/Takara, nearly all my concerns with this figure relate to the effects of the (KO) FansProject armour. Nearly all. The arms form the sides of the cabin in truck mode. If you don't transform them in the right order, then the uper arms collide with the lower arms, resulting in damage to the plastic. This is a very common problem with the mould, as both my original Prime and Magnus were second hand and had damage to their upper arms. I know what to look for to avoid this issue. I actually took a scalpel to Prime to remove the excess plastic which had been warped out of shape over time. The main concerns I have with the figure plus the armour in place are the legs, which are subjected to the terrifying ordeal of being slotted into the armour and subsequently removed. Again, I advise extreme caution and patience. You have to bend the FansProject legs quite a lot to avoid damage to the base figure, and unsightly plastic gouges. Also as I have applied the paint myself, it is obviously not as robust as factory paint.
Overall - 39/50
I had fun making this and have no regrets. Basically I had a spare Optimus Prime lying around plus a KO of the D.I.A. armour which I had no qualms about using. It would be cool if someone like FansProject eventually came up with a proper homage for this cool character, but until then, my efforts will have to do.